Bottom Watering Houseplants: 7 Safe Steps That Work
Last updated: July 23, 2026.
Affiliate disclosure: As an Amazon Associate I earn from qualifying purchases. Links marked "paid link" may earn Fern & Shelf a commission at no extra cost to you. Read our full Affiliate Disclosure.
Start here: For a complete overview, see our Indoor Gardening for Absolute Beginners.
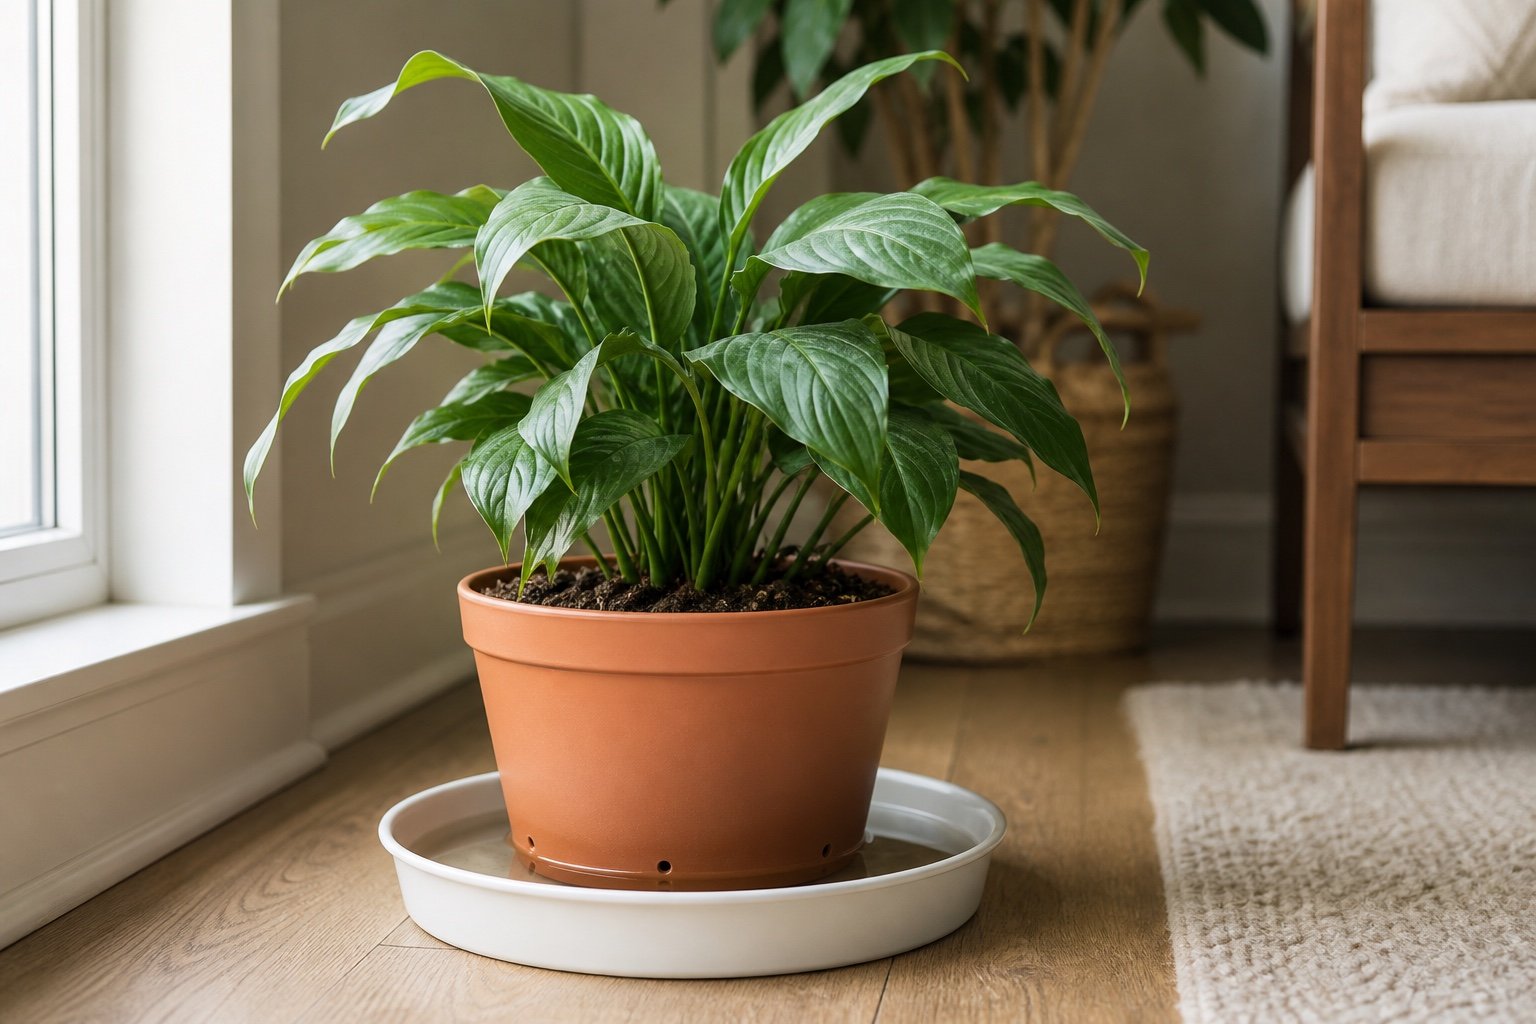
Bottom watering houseplants is simple: place a pot with drainage holes in a shallow basin, let the potting mix draw up water, then remove the pot and allow it to drain. It can rewet a stubbornly dry root ball and keep water off crowded leaves. It won't make overwatering impossible, replace drainage, or tell you when a plant is thirsty.
The catch is simple. Bottom watering changes how water enters the pot. The plant still needs a fully moistened root zone followed by an appropriate drying period. A calendar is no more reliable from below than it is from above.
Bottom watering houseplants at a glance
| Question | Practical answer |
|---|---|
| What kind of pot works? | A pot with one or more open drainage holes |
| How deep should the water be? | About 2 to 3 inches in a basin for an ordinary houseplant pot |
| How long does it take? | Often 15 to 30 minutes, though a very dry mix may need longer or a second soak |
| How do I know it worked? | The surface begins to feel moist or the pot feels evenly heavier |
| What happens afterward? | Remove the pot, let excess water drain, and empty the saucer or cachepot |
| Can I always water this way? | Yes for many plants, but occasionally water from the top to help rinse accumulated salts |
These are working guidelines, not a timer that fits every container. Pot size, drainage openings, the ingredients in the mix, and how dry it became all affect the soak.
What bottom watering can and cannot do
Water moves upward through the small spaces in potting mix by capillary action. A drainage hole connects the mix to water in the basin, so the root ball gradually absorbs moisture from below. Virginia Tech Extension describes a shallow basin with 2 to 3 inches of water and a typical soak of 15 to 30 minutes.
The method is useful, but it is not self-regulating. A pot left in water can remain saturated after the root zone is wet. Roots still need oxygen. The plant can also be watered too frequently even if each watering starts in a tray.
Bottom watering won't:
- fix compacted or decomposed potting mix;
- create drainage in a pot without holes;
- remove the need to check moisture before watering;
- prevent mineral salts from accumulating;
- cure root rot, fungus gnats, or another existing problem.
If the mix stays wet for many days, address the pot, root health, and drainage instead of changing only the direction of watering. Our guide to potting soil that is not draining explains the common structural causes.
Bottom watering houseplants in 7 steps
Step 1: confirm that the pot has a drainage path
Lift the inner pot and look underneath. At least one drainage opening must connect the potting mix to the water. A sealed decorative planter cannot absorb water through its base. If the container itself is the problem, the indoor pot guide explains the practical drainage and material choices.
Double potting works well. Keep the plant in a nursery pot with holes, lift that pot out of the decorative cachepot, and soak it separately. Never fill the cachepot and forget the plant inside it. Water trapped around the inner pot can keep the lower roots saturated.
Check that roots, a flat saucer, or compacted debris have not sealed the holes. Do not enlarge an opening while the plant is sitting over water. Move it to a stable work surface first.
Step 2: check whether the plant is ready for water
Touch the mix at the depth appropriate for the plant, lift the pot to judge its weight, and look at the leaves for a pattern rather than one dramatic symptom. Wilting can come from dry roots, but it can also occur when damaged roots sit in wet mix.
Our guide to how often to water indoor plants covers the moisture checks in detail. The short version is to water according to the root zone, not the weekday.
If the pot is already heavy and the mix feels wet, stop. Bottom watering isn't a rescue step for an overwatered plant. Follow the overwatered plant guide if leaves are yellowing or collapsing while the root ball remains damp.
Step 3: use a clean, shallow basin
Set the pot in a sink, tub, dishpan, or sturdy waterproof tray. For a typical small or medium houseplant pot, add roughly 2 to 3 inches of room-temperature water. The water should reach the drainage holes without rising over the rim of the pot.
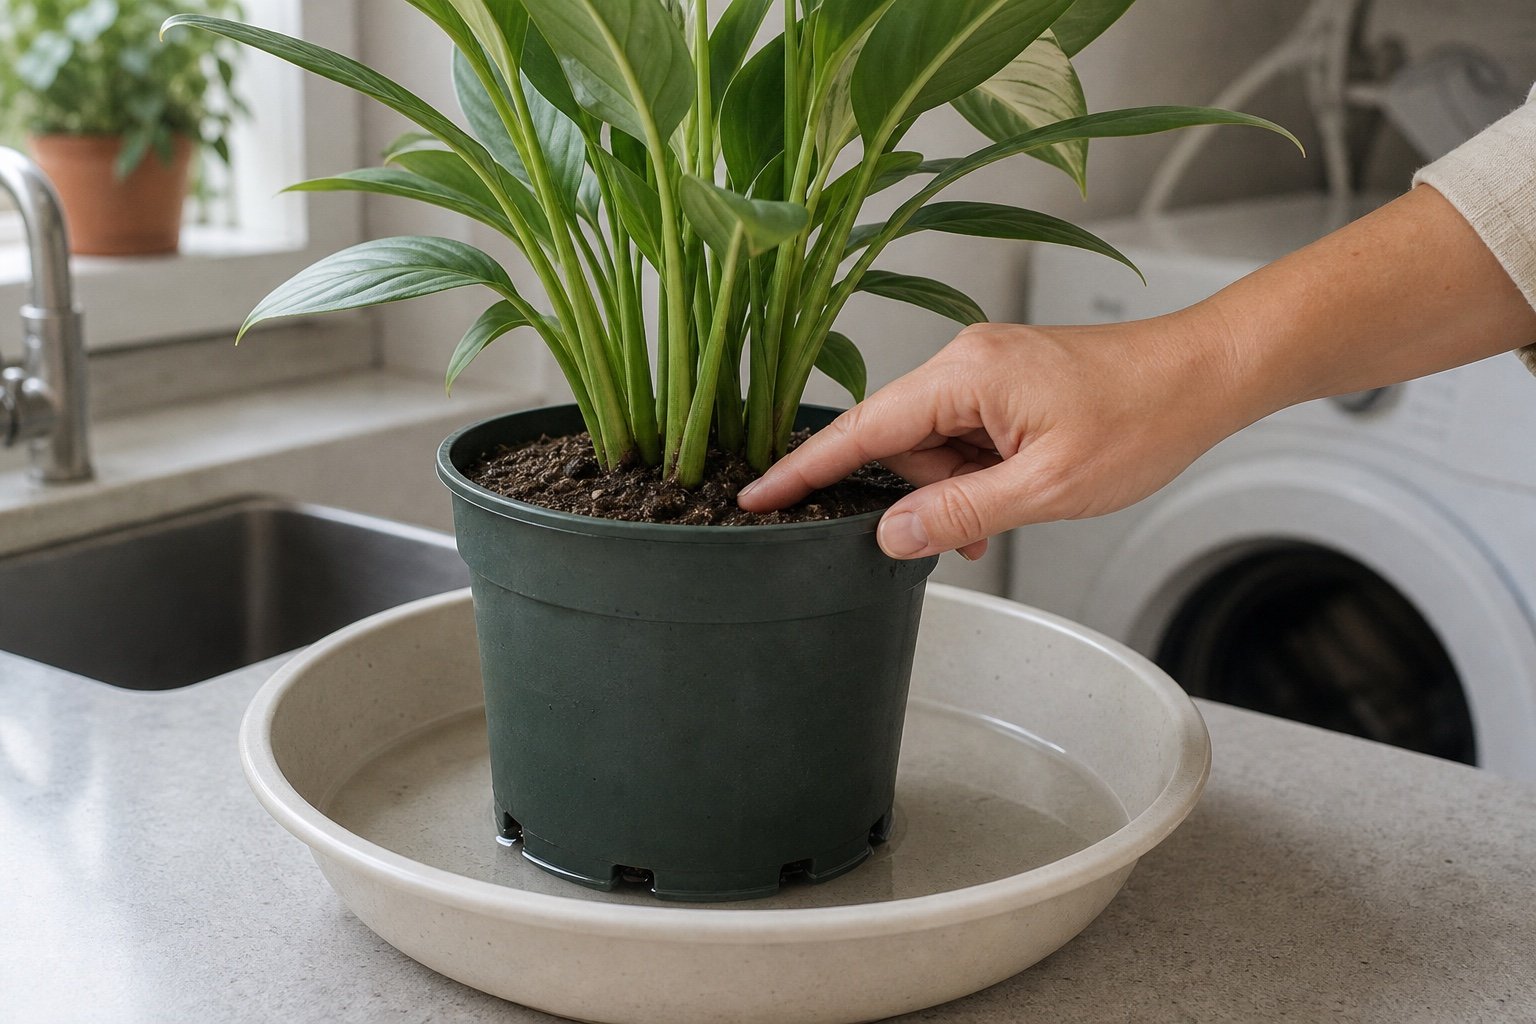
A wide tray is handy when several small nursery pots need water, provided all the plants are healthy. Don't share soak water with a quarantined plant or a pot that may carry pests or disease. Empty and clean the tray between questionable plants.
Search Amazon for a shallow waterproof plant watering tray (paid link)
Step 4: let the root ball absorb water
Place the pot upright in the basin and leave it undisturbed. Most ordinary pots take about 15 to 30 minutes. Tiny pots may wet sooner. A large container or a severely dry, peat-heavy mix can take longer.
Don't judge progress from the bottom inch alone. The aim is to moisten the full working root zone. Check the surface with a finger. If it starts to feel slightly moist, or the pot feels substantially and evenly heavier when lifted, water has moved through the mix.
Very dry potting mix can become water-repellent and pull away from the pot wall. In that case, the first soak may wet only a narrow path. Let the pot drain briefly, test several points, and repeat if the center remains dry. A wooden skewer inserted into the mix can help reveal a dry core, though it should slide in gently so roots are not torn.
Step 5: remove the pot before it becomes a permanent soak
Virginia Tech advises not leaving a pot in the basin for more than 60 minutes. That is a sensible outer limit, not a target. Remove the pot as soon as the root zone is adequately moist.
If the surface is still completely dry after a long soak, check the drainage holes and the condition of the mix. The answer may be a second controlled soak, careful top watering in stages, or repotting into a more functional mix. Leaving the pot overnight won't repair it.
Step 6: let every pot drain fully
Move the plant to a sink, rack, or empty tray and let free water escape. A heavy ceramic pot may need a few extra minutes before it stops dripping. Then return it to a dry saucer or cachepot.
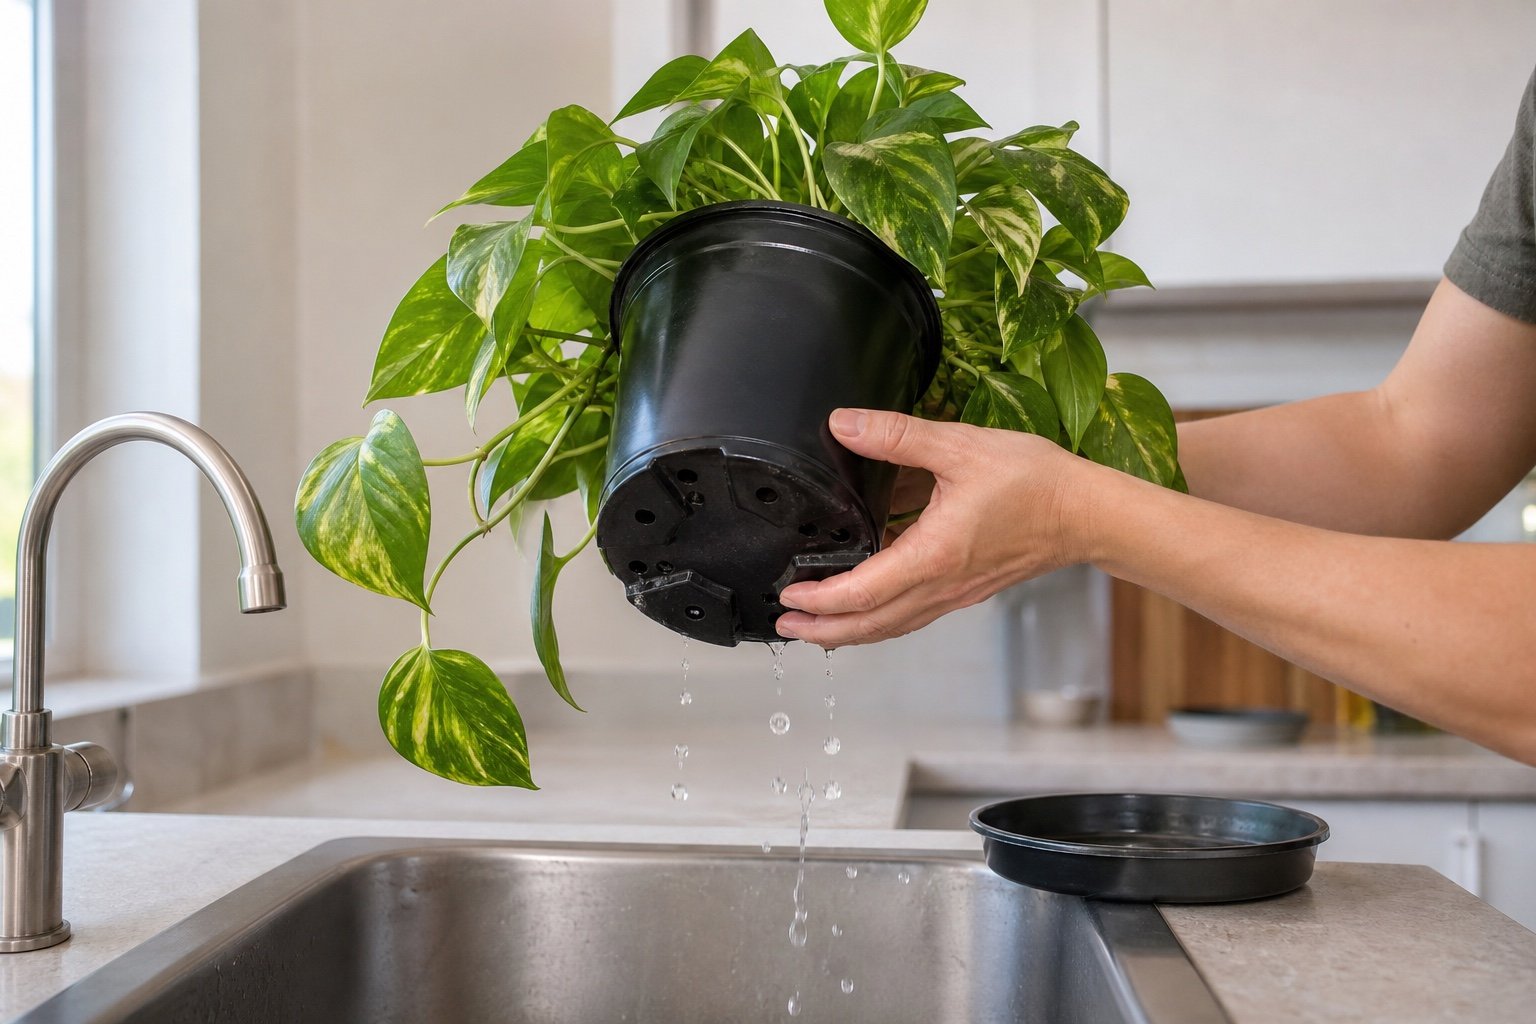
Check again after ten minutes. Water sometimes continues to collect after the first drain. Empty it rather than letting the pot stand in runoff. University of Maryland Extension is direct on this point: excess water should be removed, and a houseplant should not remain sitting in it.
Step 7: occasionally water from the top
Fertilizer and minerals in tap water can leave soluble salts in potting mix. With repeated bottom watering, those salts are not carried down and out as readily. A pale crust on the soil surface or pot rim is a useful warning sign.
Missouri Extension recommends occasional top watering to leach accumulated salts. Take the plant to a sink, apply water slowly across the surface, and let it run freely through the drainage holes. Empty the runoff. Don't do this to a plant whose roots are already waterlogged.
A small watering can makes the flush easier to control around dense foliage.
Search Amazon for a small long-spout indoor watering can (paid link)
When bottom watering is especially useful
The potting mix has become hard to rewet
A dry peat-based mix may shed water down the gap between the root ball and pot. Slow absorption from below gives it time to rehydrate. If this happens at every watering, the mix may be old, compacted, or poorly matched to the plant. Repeated rescue soaks should prompt a closer look at the root zone.
The foliage crowds the soil surface
African violets, cyclamen, begonias, and other low or dense plants can be awkward to water from above without splashing the crown and leaves. Nebraska Extension specifically notes bottom watering as useful for cyclamen and African violets.
This is about control, not a belief that one drop will ruin a leaf. Water on foliage becomes more troublesome when it remains there in cool, dim, poorly ventilated conditions.
Several healthy plants sit in small nursery pots
A shallow tray can water a group without repeatedly aiming a spout at tiny containers. Group only plants that are healthy and ready for water at the same time. Remove each one as its root ball becomes moist. Sharing a tray does not mean every pot needs the same soak length.
You use a capillary mat for a short absence
A capillary mat can supply water from a reservoir to pots with flat, well-connected drainage openings. Test the setup before travel because pot design and mix determine whether contact works. It is better suited to plants that prefer even moisture than to succulents that need a clear dry interval.
Search Amazon for a capillary watering mat (paid link)
For a longer trip, compare this with the options in our self-watering planter guide. A tested trial run matters more than the label on the system.
When to skip bottom watering
Choose another response when:
- the container has no drainage holes;
- the mix is already wet or smells sour;
- roots are soft, dark, or decaying;
- a confirmed pest or disease could spread through shared water;
- the pot is too heavy to lift and drain safely;
- mineral crust is visible and the plant needs a careful top flush;
- the species needs the mix to dry substantially and a reservoir would keep it wet.
Bottom watering houseplants also won't eliminate fungus gnats. The upper surface may stay drier during some soaks, but water still moves through the organic mix where larvae live. If small flies are present, identify them and use the full fungus gnat routine instead of treating bottom watering as pest control.
Bottom watering versus top watering
| Situation | Bottom watering | Top watering |
|---|---|---|
| Dry mix pulling away from the pot | Often useful for slow rehydration | May run down the sides unless applied in stages |
| Dense, low foliage | Keeps the pour away from leaves and crown | Requires a narrow spout and careful aim |
| Checking runoff | Runoff is not the goal | Useful for flushing accumulated salts |
| Pot without drainage | Does not work | Still risky because excess water cannot escape |
| Suspected root rot | Not a treatment | Not a treatment |
| Many small healthy pots | Efficient in a shared tray | Easy to tailor pot by pot |
Neither method is universally better. Many collections do well with both: bottom water when it solves a practical problem, then top water occasionally when the root zone needs a thorough flush.
Troubleshooting a bottom-watering problem
The top stays dry after 30 minutes
Confirm that water touches the openings and that the holes are clear. A hydrophobic core or very coarse mix can slow the climb. Test the center rather than waiting indefinitely. If the same pot resists water every time, inspect the mix and roots.
Only one side of the pot feels wet
The mix may have channels, gaps, or uneven compaction. Rotate the pot for a short second soak. If the pattern persists, a fresh, evenly packed potting mix may be the real fix.
The pot stays heavy for a week
Stop watering and assess light, temperature, pot size, mix structure, and root health. Moving water from below does not correct slow drying. Persistent wetness plus yellowing or collapse deserves a root check.
White crust appears on the soil or rim
This often points to mineral or fertilizer salt deposits. Pause fertilizer, scrape away a loose surface crust without damaging roots, and top water thoroughly when the plant is ready. Severe recurring buildup may justify repotting and a review of water quality.
Leaves still wilt after the soak
Don't add more water automatically. Check whether the center of the root ball became moist throughout. If it did, consider root damage, temperature stress, intense light, pests, or another cause. Wilt is a symptom, not a moisture meter.
Frequently asked questions
Is bottom watering good for all houseplants?
It works for many houseplants in pots with drainage, but it is not automatically the best choice every time. Plants that need a pronounced dry period should not remain on a wet mat or in a reservoir. Plants in wet, failing mix need diagnosis, not another soak.
How long should houseplants sit in water?
Fifteen to 30 minutes is common for an ordinary pot. Remove it sooner if the root zone is moist, and do not leave it longer than 60 minutes. Pot size and mix can change the timing, so check the plant rather than relying only on a clock.
How deep should the water be?
About 2 to 3 inches is a useful starting depth for a small or medium pot. It needs to cover the drainage openings, not the pot rim. A shallow seedling cell may need much less.
Can bottom watering cause root rot?
The brief soak itself is not root rot, but overly frequent watering, poor drainage, or leaving a pot standing in water can deprive roots of oxygen and contribute to decay. Always drain the pot and wait until the plant needs water again.
Does bottom watering prevent fungus gnats?
No. It may leave the immediate surface less wet after some waterings, but the larvae live in moist organic mix. Correct the watering pattern and use pest-specific monitoring and control.
Should I add fertilizer to the soaking water?
Only when the plant is actively growing, ready for water, and the fertilizer label permits that application. Measure accurately and avoid feeding a stressed or waterlogged plant. Periodic top watering remains helpful for rinsing salts.
Can I bottom water in a decorative pot?
Only if a separate inner pot has drainage holes and can be removed to drain. A sealed decorative pot by itself cannot draw water through the base and can hide standing runoff.
Use the tray as a tool, not a rule
Bottom watering houseplants works best as a deliberate method for a real problem: a dry root ball, crowded foliage, or a row of small healthy pots. Check moisture first, soak only until the root zone is wet, drain completely, and top water occasionally to rinse salts.
The useful habit is not always watering from below. It is noticing what happened inside the pot and adjusting before the next watering.
Sources and further reading
- Virginia Tech Extension: Properly Watering Container Houseplants
- University of Maryland Extension: Watering Indoor Plants
- Missouri Extension: Caring for Houseplants
- Nebraska Extension: Choosing a Container for Houseplants
- University of Connecticut Extension: Watering Houseplants
- University of Wisconsin Extension: Houseplant Care