How to Repot a Houseplant Without Killing It (A Guide for Nervous Plant Owners)
Last updated: June 10, 2026.
I put off my first repot for almost a year. I was convinced I’d snap the roots, shock the plant, and undo two years of keeping the thing alive. When I finally did it, the whole job took eleven minutes and the plant pushed out new growth within a month.
So if you’re nervous, I get it. But repotting is closer to changing a duvet cover than performing surgery. Here’s exactly how I do it, what I’d skip, and the two mistakes that actually do kill plants during a repot.
How to know it’s actually time
Plants don’t need repotting on a schedule. They need it when they tell you. The signs:
Roots coming out of the drainage holes. The clearest one. The plant has filled the pot and is looking for the exit.
Water runs straight through. If you water and it pours out the bottom in seconds, the pot is mostly roots and there’s barely any soil left to hold moisture. (If you’re not sure whether your watering habits or the pot are the problem, my guide on how often to water indoor plants helps you tell the difference.)
The plant dries out absurdly fast. Thirsty again three days after a proper soak, in normal indoor temperatures, usually means rootbound.
It’s been 2+ years in the same pot. Even if the plant looks fine, the soil itself breaks down and compacts over time. Old, collapsed soil also stays soggy at the bottom, which is exactly the environment that invites fungus gnats into your home.
One sign that does NOT mean repot: yellow leaves on their own. Yellowing has half a dozen causes, most of them watering or light, and repotting a struggling plant often makes things worse. Run through why houseplant leaves turn yellow first and rule out the simple stuff.
Picking the new pot (the part people overthink)
Two rules and you’re done:
Go up one size only. That means 1 to 2 inches (3 to 5 cm) wider in diameter. A 6-inch plant goes into an 8-inch pot at most. The classic beginner mistake is “buying room to grow” with a huge pot. All that extra soil holds water the roots can’t reach, stays wet for weeks, and rots the roots. Big pot, dead plant. I’ve done it, you don’t have to.
It must have a drainage hole. Non-negotiable. If you’ve fallen in love with a holeless ceramic pot at Target or H&M Home (or a Übertopf from a German garden center, which is literally designed for this), use it as an outer sleeve and keep the plant in a cheap plastic nursery pot with drainage inside it. Best of both worlds, and it’s how most European plant owners do it by default.
Terracotta versus plastic: terracotta breathes and dries faster (great for snake plants and anyone who overwaters), plastic holds moisture longer (great for ferns and anyone who forgets). A basic 8-inch terracotta pot runs about $6 at Home Depot, around £4 at B&Q, and a couple of euros at OBI. This is not a place you need to spend money.
What soil to use
Fresh potting mix, not garden soil, and not the dusty remains of the old pot. The right bag matters more than people think, and the wrong one is behind a lot of mystery plant deaths. I wrote a full breakdown of the best potting soil for indoor plants, but the short version: a quality indoor mix, plus a few handfuls of perlite if it feels dense.
The actual repot, step by step
- Water the plant a day or two before. A slightly moist root ball slides out clean. Bone dry crumbles, soaking wet tears.
- Lay down newspaper or do it in the shower. In my one-bedroom apartment, the bathtub is my potting bench. Zero regrets.
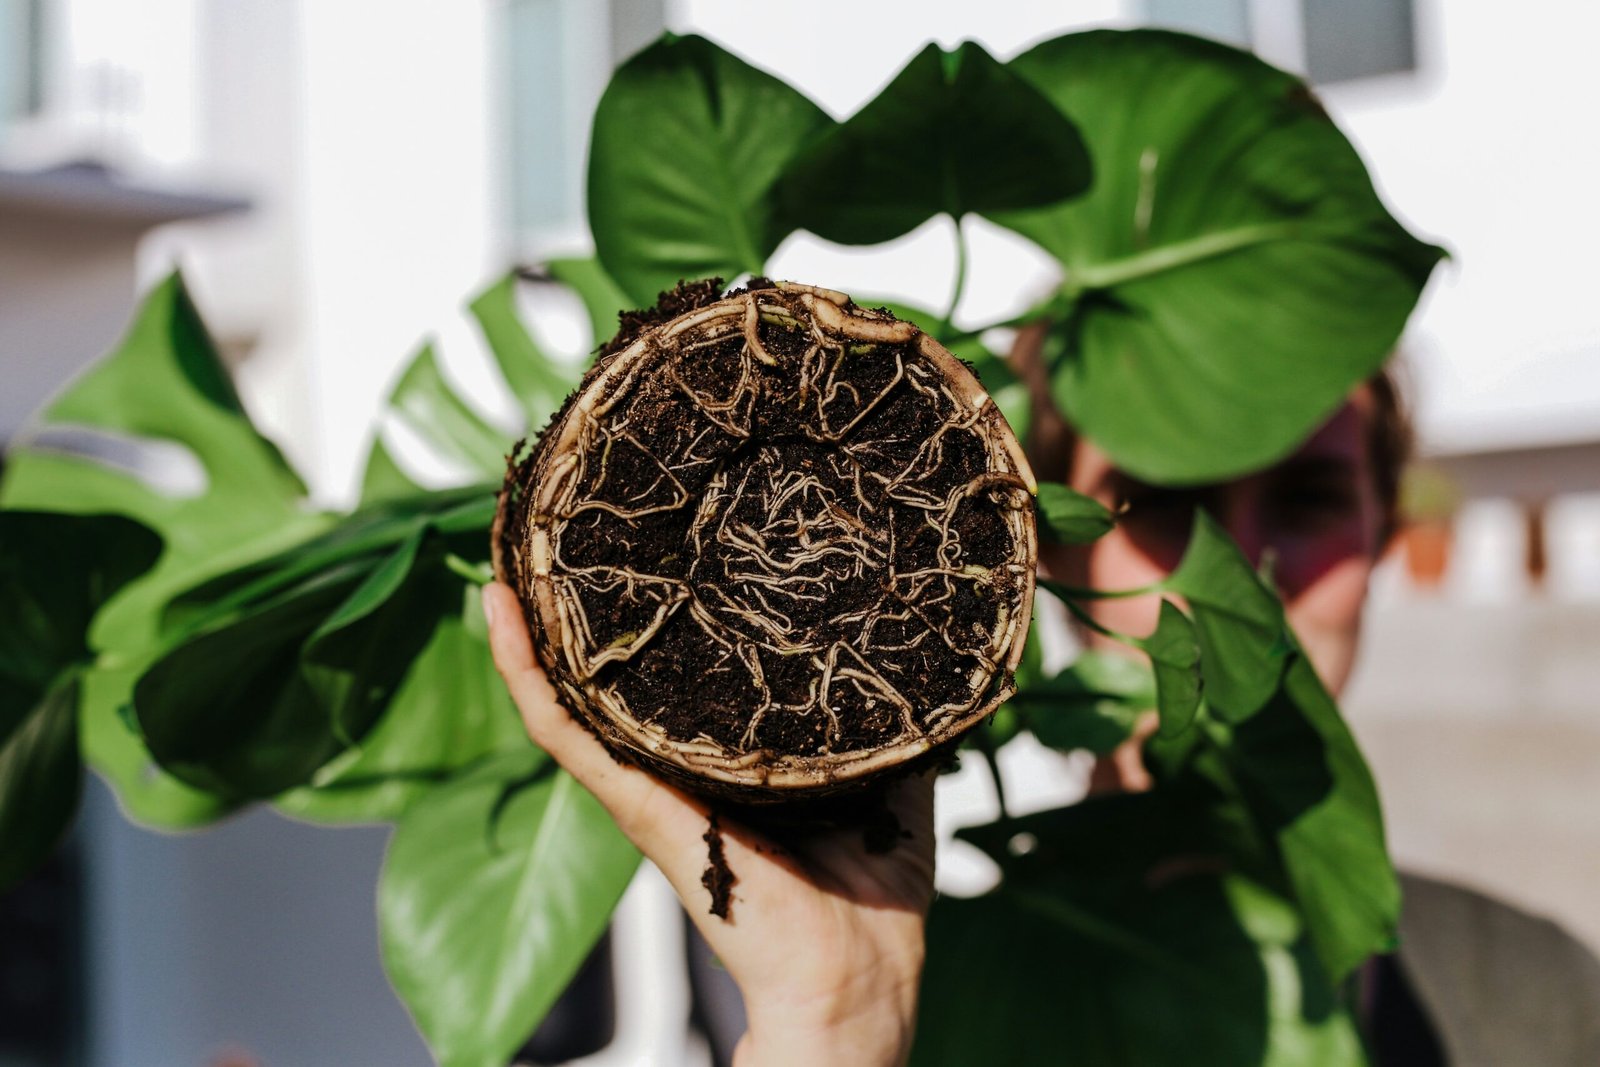
- Tip the pot sideways and squeeze or tap it. Hold the plant at the base, not by the stems, and ease it out. If it’s stuck, run a butter knife around the inside edge. Never yank.
- Loosen the root ball gently. Tease the outer roots apart with your fingers, especially if they’re circling the bottom. If they’re densely wound, it’s fine to slice an inch (a couple of centimeters) into the sides in two or three places. It looks brutal. The plant doesn’t mind.
- Trim anything dead. Mushy, brown, smelly roots get cut off with clean scissors. Healthy roots are firm and pale.
- Add soil to the new pot, set the plant, backfill. The top of the root ball should sit about an inch below the rim. Fill around the sides and press lightly. Don’t compact it like you’re tamping espresso.
- Water thoroughly and let it drain. This settles the soil around the roots. Top up any spots that sink.
That’s it. No gravel layer at the bottom, by the way. It’s an old myth, it actually raises the soggy zone closer to the roots, and the RHS has been telling people to skip it for years.
Aftercare: the week where people panic
Your plant may sulk. A dropped leaf or two, a bit of drooping. This is normal transplant adjustment, not a death spiral. Keep it in the same light it had before, don’t fertilize for about a month (fresh mix has nutrients, and stressed roots burn easily), and don’t water again until the top inch of soil is dry.
Timing-wise, spring and summer are ideal because the plant is actively growing and recovers fast. If it’s the middle of the dark winter months, I’d wait until March unless there’s an emergency like rotting roots.
One last thing: those roots you trimmed and stems you knocked off? Some of them are free plants. Pothos, philodendron, and tradescantia cuttings can go straight into a jar on the windowsill. Here’s how to propagate houseplants in water so the repot mess turns into new plants.